Showing posts with label projects. Show all posts

Wednesday, February 20, 2013

Pretty in Pink. A DIY.

Hello! This week's post is brought to you by creative Kristen. It's been a while since she's appeared in life, but it's good of her to show up for a little while, wouldn't you say?

I started searching for a make up brush roll, mostly because I want to keep my brushes in good shape. The ones I came across all seemed to be too industrial looking. Black...pleather...ugly. Make up is supposed to enhance beauty, so shouldn't a make up brush roll be beautiful? Obviously the make-up-brush-roll-makers haven't done the math.

After digging through some craft supplies, I skeptically started to sew. And it turned out! Here's how I did it.
 Time frame:
Amateurs like me: about 1.5 hours
Pro's: 2.5 minutes


You'll need: 2 colours of fabric (or one. If you're feeling monotone), a plastic sheet protector (or any kind of thin plastic), a sewing machine, stamps (optional), 2 pieces of ribbon, and the tallest items you'll be putting in your roll. 


1. Iron your fabric. See that wrinkly fabric in the first photo? Not nice. 

2. If you've chosen a solid colour for the inside, and wish to stamp it, go for it! I used my new camera stamp from The Plaid Barn (thanks sis!).


3. Cut 3 pieces of fabric, 2 the same size (inside - printed fabric, and outside of your roll), and 1 piece for the pocket (same width, about half the height. Use your brushes to see how tall this piece should be). I chose my outside to be pink, and the pocket to be pink. I didn't measure here, just did some official sewing lady guesswork. 

4. Hem the side edges, and the top edge of your pocket piece of fabric. 

5. Sew the plastic sheet to your inside fabric. This is to protect that lovely printed fabric from getting full of make up dust. My plastic wasn't quite big enough to cover the entire thing, but it works just fine. 

6. Sew the bottom and side edges to the printed piece of fabric. Sew some pockets. I did various sizes.


7. Find your outside piece of fabric and 2 pieces of ribbon. I had to do some more guesswork here to figure out how far to sew the ribbon so it will still tie when rolled. I basically filled my pockets of the inside piece, placed it against the outside piece, rolled it up, then measured the circumference of the roll. Mine was about 20 centimetres. After being unrolled, I decided to sew from about 5 cm - 20 cm, to leave some tying room on the ends of the ribbon.


8. After the ribbon is sewn, place the right sides of the outside piece, and the inside piece together, tucking the ribbons into the centre so you don't sew them! Sew 3 sides, flip right side out, fold last edges inward, and sew.

9. It's done! I filled mine with more than brushes. And it's wonderful.


Here's the little project all rolled up. Works wonderfully at home and for travelling. 

What do you think? Would you try this easy sewing project? My instructions aren't amazing, and I am definitely still learning, but it was a fun project. 

Have a lovely rest of your week!

Friday, November 16, 2012

Findings.

Want to know something interesting I found? I'm 25-34. According to Google. Who knew, I spend time on more mature websites than my age. Next thing I know I'll be wearing a monocle and saying, 'quite, darling'.

Here's a spectacular photo I found this week. Beautiful colors, vintage pottery, yellow craspedia (i had to look up the name...should have asked my mom!), and a generally cozy space. A perfect space to relax. I'm feeling quite relaxed this week, as I am looking forward to my FIRST WEEKEND OFF (without being sick or away) since I started my job! Excited? Only a little.


                                                                      Source: blog.justinablakeney.com via Kristen on Pinterest


I also love this sentimental book shelf. Old family photos are lovely.

                                                                        Source: abeautifulmess.com via Kristen on Pinterest


What was your favourite find of this week?

Enjoy!

Monday, June 27, 2011

What a Spectacle.

Hello friends! I got new glasses!


As you can see, I'm super excited about them. Don't mind my after-work-hair.

Do you love them as much as I do?

Here is another blogger who wears glasses. Isn't she fantastic? I love her blog.

Sometimes you just need a summer project. I've been feeling project-less lately. Here, on Design Sponge you can make a neat plate! (Or click on the picture)
With ceramic markers?? Whaaat? I'm going to have to track these down. The latest fun thing I found has been chalkboard paint. In multiple colours! It's pretty neat.

Do you have a summer project?

Enjoy!

Sunday, November 14, 2010

Craft Retreat..at home.

Have you noticed the new banner and background? I thought it was nice and wintery, since winter has set in here! I have had many ask about the name of my blog, and it is NOT because I live in a place where it is summer all the time. definitely not. I actually just happen to enjoy summer, and when I think of summer, I think happy, sunny thoughts. I am an extremely optimistic person, so...

summer=happy=kristen

That, and it's a line from a Feist song, 'Gatekeeper'. I enjoy that song a lot.

Clarified!

Oh, I have missed crafting! During term break, I have been so excited to just craft and listen to Christmas music for the first time of 2010 for four days straight!

Thanks to my sister Jenni, I decided to try a new plant (my strawberry plant wasn't too ecstatic about living indoors), and so:

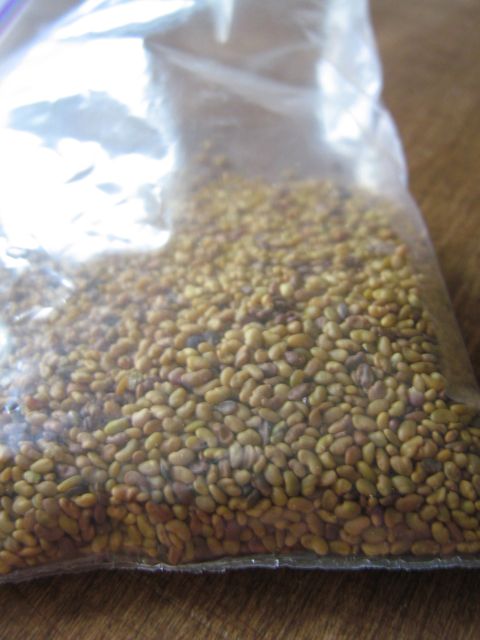
Presenting, sprouts!

They started out as these, wee little guys:

And thanks to warm water and a Mason Jar with cheesecloth, they're flourishing!


I think they look ravishing! I plan to eat them on a sandwich. When, you ask? No idea, but if you know of anyone who would like to eat a sandwich with sprouts as a vegetable on it, I know a sprout supplier! If you're looking to grow your own, here's some instructions I found helpful.

Onto Project numero Two: (I don't speak any other language than english. i know, i had you convinced for a second...secundo?)


Is it weird or neat? I truly do not know. It's a satchel of some sort. I was thinking of attaching an old leather belt as a long strap to it. Made out of MCC fabric and Wal-Mart fabric. No pattern necessary!

Project Three:


I'm an open book, really. I decided to take an old book a few weeks ago, wanting to create one of those secret compartment books (I was an avid Nancy Drew reader at one point, and I am pretty sure she must have used one of these). It's not finished yet. I'm about two hundred pages in. Here's how to attempt this one.

Project Four:


Just some more wall art for my dorm. I painted an old frame, and really wanted to keep some of my favourite tea boxes. Anyone who remembers Tazo African Red Bush knows what i'm talking about. Three boxes of it stashed away displays my lifelong devotion to this magical tea.

And! I promised I would display some of my tea cups. Here's a few!
Ikea find.


Ten Thousand villages. It's so textured - I love it!

Try having your own craft weekend. It's super fun.

Enjoy!

Wednesday, July 14, 2010

Off the Loom

I think pretty fabrics are the beginning of all things good. Yesterday, I went on a 'crafty morning shopping trip' with the eldest of my 3 sisters. Now this wasn't just any shopping trip, this was a crafty shopping trip where I don't spend any more than i have to! No regular priced items, no top-of-the-line items- this was the shopping trip of a soon to be college girl.

Stop Number One
Our first stop, Dollar Giant. The place where one's dollar suddenly becomes quite giant, and you seem to be able to get a lot more for your dollar. Not quite quality items, but satisfactory. Here, I found canvases! I felt in a painting mood, and ended up not creating much, but it was fun just the same.

Stop Number Two
MCC! The Mennonite Central Committee Thrift Store! Going back to my roots, I searched and searched for a true mennonite deal! Here i was able to find the highlight items of my day! I found some pretty great deals on fun fabrics! I have decided to create something, not sure what yet, but something out of these threads that were woven together simply to make my heart all a-flutter.

Stop Number Three
Michaels Craft Store brought us to our final destination on this race to find the best crafty supplies. Here is what I usually print off before I head to this wonderland of craft inspiration, but this time, we went un-prepared. For as we walked into that place many know as craft central, and as we turned onto the paper aisle, a green and yellow sign caught our eyes. '3 for $1'. Three pieces of paper for a single dollar? No! this can't be! Even the clearance paper is still $0.50 each! But it was reality! A glorious reality! The fine print did say that this deal was only for the regular priced $0.99 paper, but this still gave us great options! I walked out of that store with 6 beautiful pieces of paper for a mere $2.00. That's what I call a success story!

Here are my favourite purchases of the day!


I wanted to just snuggle right into that fabric! The eyes in the background were truly accidental!


And what comes from pretty fabrics? Pretty clothes!

A pretty shirt- Urban Outfitters

A pretty dress -Forever 21

Enjoy!